Control Panel
OVERVIEW OF INTRWIZ
Intrwiz is the most sophisticated travel platform in the world; it is full of content and has 24/7 customer support. It was designed by industry experts to give travel agents a decisive advantage in the marketplace and innovate the travel industry through a unique platform. Intrwiz introduces seamless interaction between the travel agent and the customer that provides unparalleled collaboration between the agent and the customer.
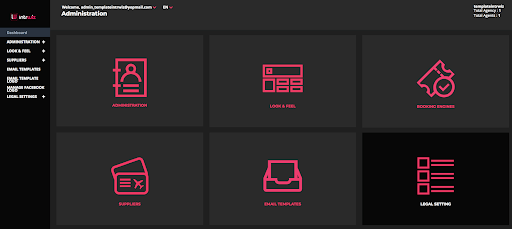
Administration Section
The Company administrator can manage the entire network from this section. It allows the company administrator to edit, add and delete agencies and agents, as well as setting up Intrwiz Payment Options.
All the settings made on the control panel manage ALL the Online Collaborative Booking Sites.
It is critical to note that the platform allows the Company Administrator to create online booking solutions linked with an Interactive dashboard for unlimited amount of agents and /or sales channels – each with their interactive dashboards and all managed via one centralized control panel.
Manage Company, Agency and Agent
Setting up The Network is easy.
The hierarchy is: Set up Company, add all your Agencies and then add your Agents and link each Agent to an Agency.
All settings in the Control Panel are the same for the whole Company, i.e. all Agencies and Agents. If you need separate settings for an Agency, please get in touch with us.
Step 1: Set up Company information.
Step 2: Setup all your Agencies in the Agency section using Add Agency Functionality.
Step 3: Set up all your Agents in the Agent section using Add Agent Functionality and assign them to Agencies.
Note – Each agent set up will receive an email with their Online Collaborative Booking Solutions and their own individual Agent Dashboard credentials.
Look and Feel
Customize the look and feel of the Collaborative Online Booking Solution for ALL sites and Dashboards, using this tab in your Control Panel.
Logo and Icon
This is where you upload logotypes and icons you want to use.

Colors and Styles
This is where you set what colors to use in the Online Collaborative Booking Solution.

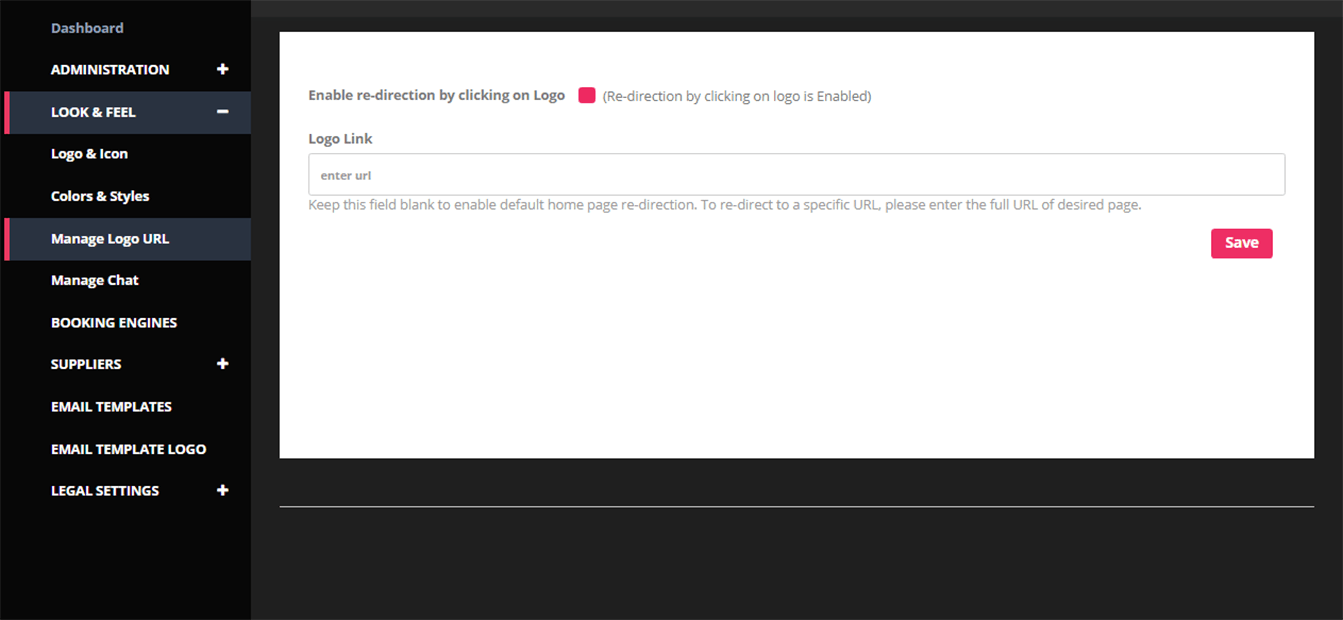
Manage Logo URL
This functionality allows you to link back to your own website from the Online Collaborative Solution. By clicking your logo in the Online Collaborative Solution the customer will then be re-directed to your home page or any page that you enter in the Logo Link box.
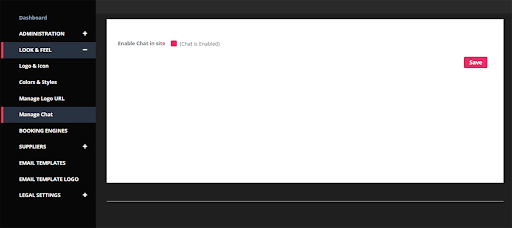
Manage Chat
Enable or disable the chat functionality in the collaborative booking engine.
Booking Engines
The company Administrator can manage all Booking Engines (product segments) in this section.
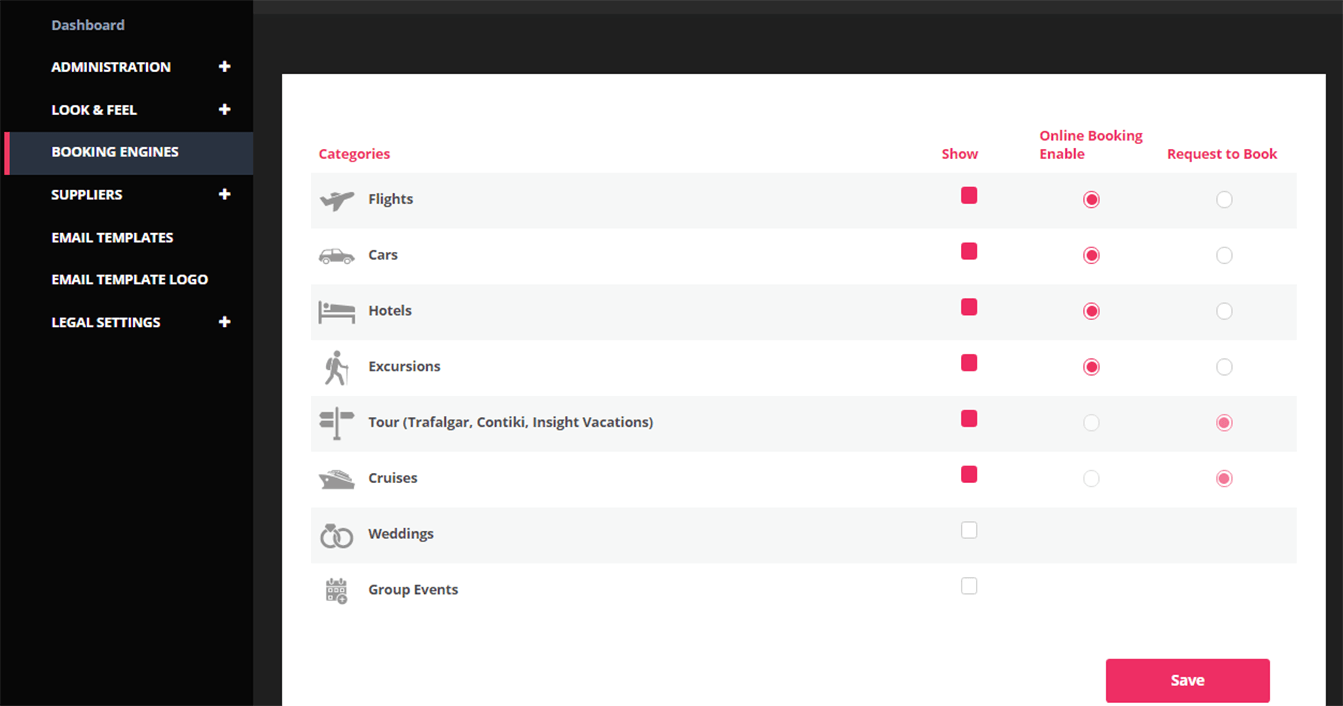
Online Booking
Please contact customersuccess@intrwiz.com to set up your commercial model the various online booking solutions available on Intrwiz.
Request to Book
Tours and Cruise are not enabled with online booking. End user can request to book the content and the travel agent will make the booking via their own channels and simply use Intrwiz to drive new leads and convert them into bookings. This is all managed via the Travel Agent Interactive Dashboard. You can set any product segment to Request to Book.
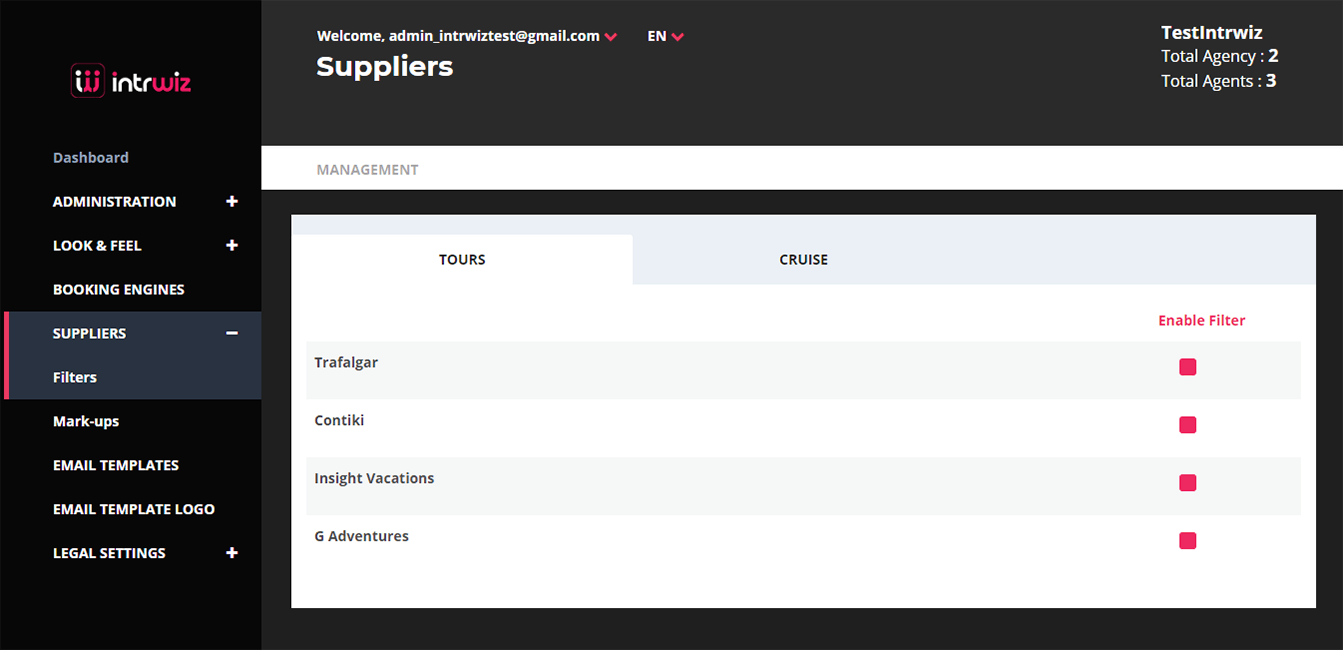
Suppliers
In this section, you can set your supplier filters and markups.

Filters
For Tours and Cruise, the Company Administrator has the ability of turning off suppliers.

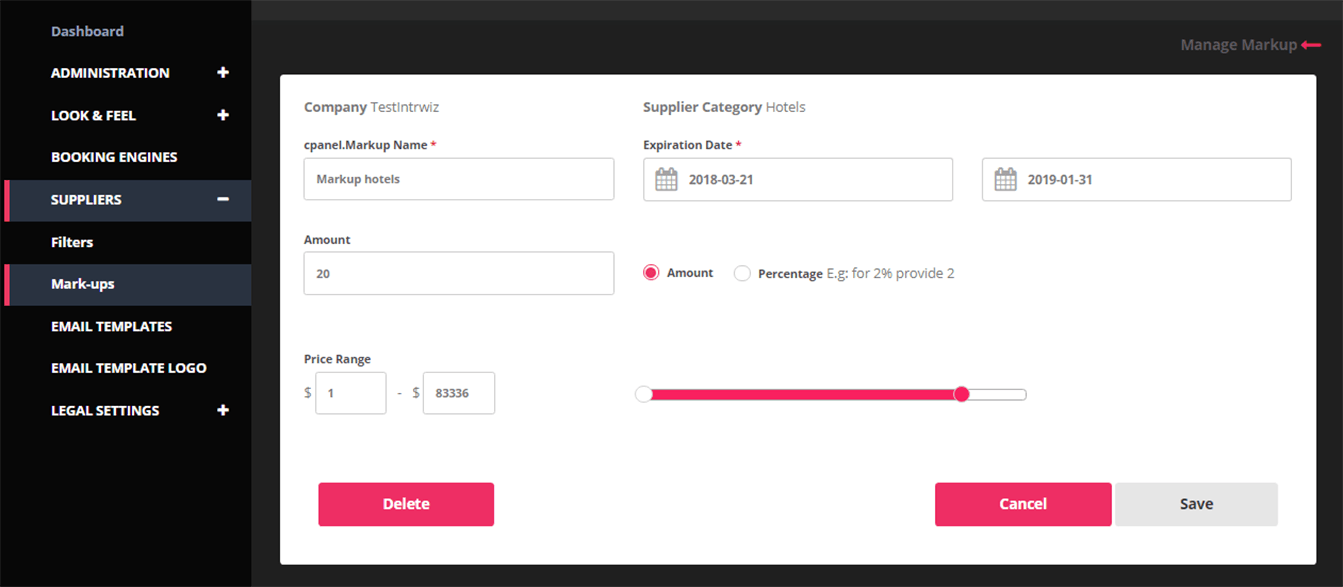
Mark-ups
This option, which allows the Company Administrator to set up mark-ups if needed, is only available for Flight and Hotels

Mark-ups can be set as either a % or an amount. Agents can pre set mark-ups for specific time periods and also what price range a specific mark-up is valid for.
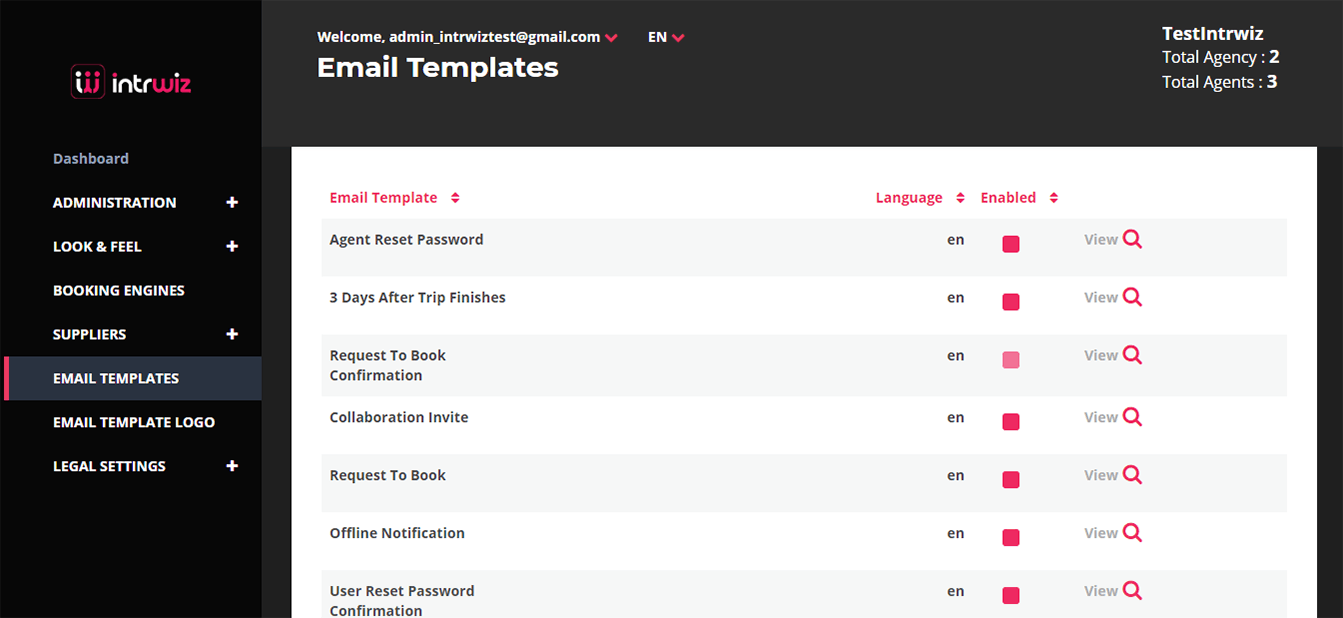
Email Templates
The system is set-up with a range of auto-triggered emails. The Company Administrator can choose what email templates to enable. All emails will be sent with your logotype and footer. If you need to adapt or add emails, please contact Intrwiz.
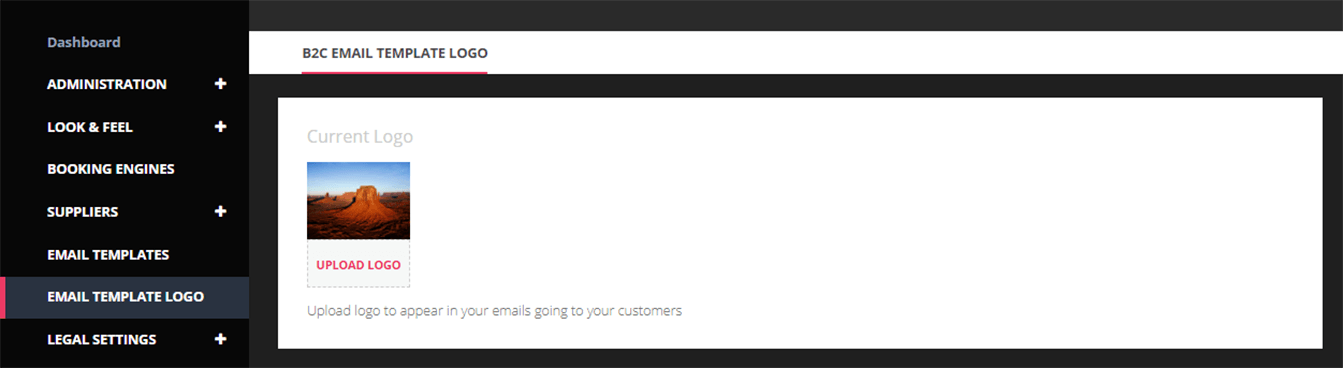
Email Templates Logo
The Company Administrator can upload the logos to be displayed on the emails. Size should be 275px * 50px.
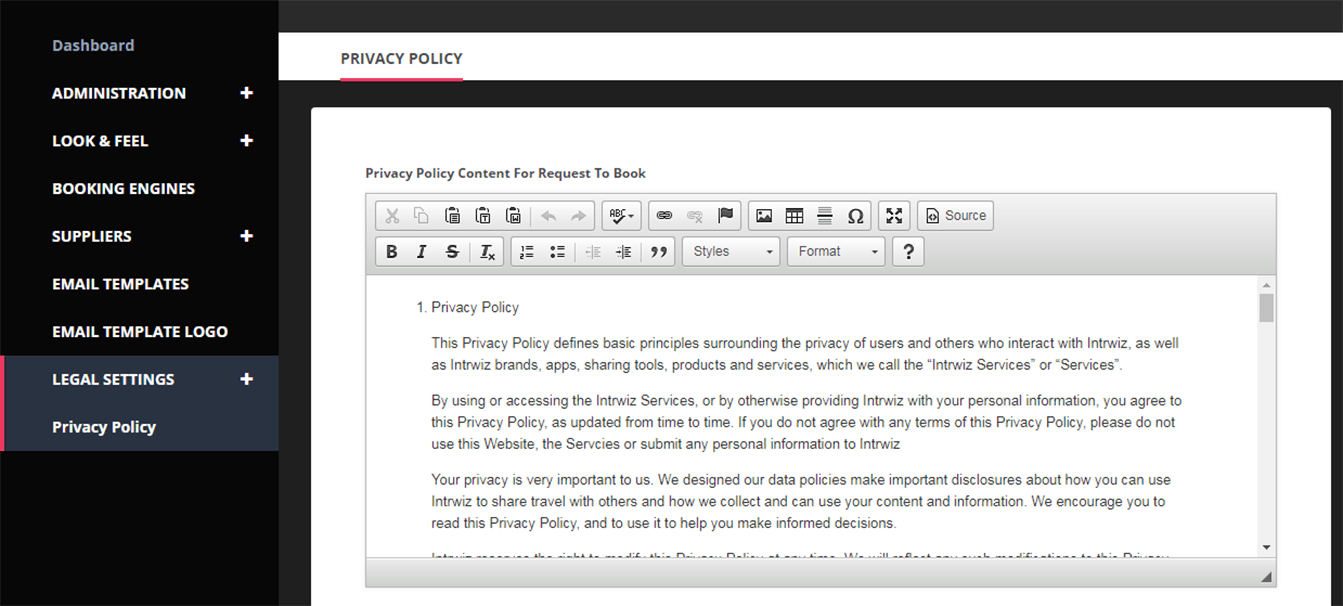
Legal Settings
The Company Administrator can set their legal and privacy terms and conditions in this section. These are then included on the Online Collaborative Booking Solution.
Intrwiz GDS Importer
Intrwiz is set-up to import booking data from three GDS systems: Sabre, Travelport and Amadeus.
We use this booking data to create a Trip in the Collaborative Online Booking Solution starting with the Flight booking.
Get Started with your GDS
Intrwiz is integrated with Sabre and Travelport, and soon with Amadeus. To enable the GDS import process, these are the steps that need to be completed:
Step 1. Contact your account manager in Sabre or Travelport to set up your account with them, which allows you to drop a booking into our GDS queue. See more details in “Travelport Queue Setup” and “Sabre Queue Setup”.
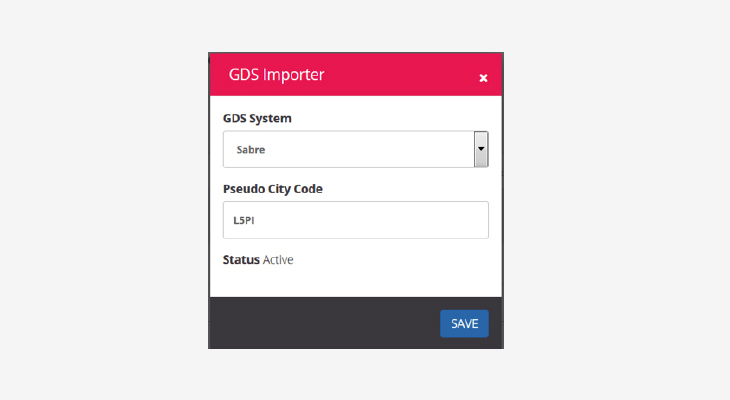
Step 2. Use the Intrwiz Control Panel to enter your GDS settings, including Pseudo City Code (PCC) of the agency and agent sign on code for each agent within the agency. See below sections for more details.
Once proper settings are entered, the Intrwiz application will look into the GDS queue and import the booking that matches the agency and agent’s settings.
In the Control Panel:
Log in into the Control Panel as a Company Admin. After creating the Agency, go to the “Agency” tab and click “Edit”.
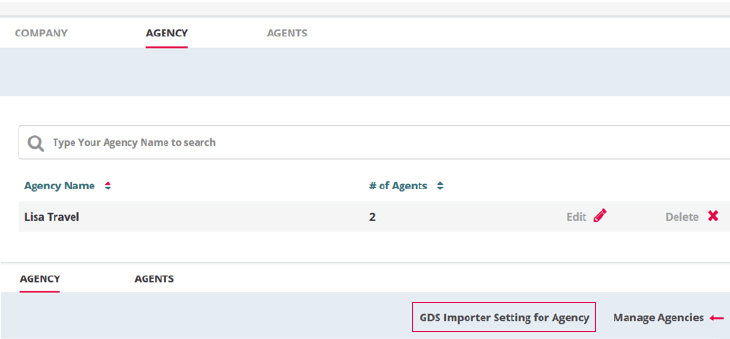
Click on “GDS Importer Setting for Agency” and a modal will pop up. Enter the Pseudo City Code (PCC) for the GDS system that applies to you.
As a Company Admin, you can also create Agents through the Control Panel and then enter the GDS settings for the specific Agents.

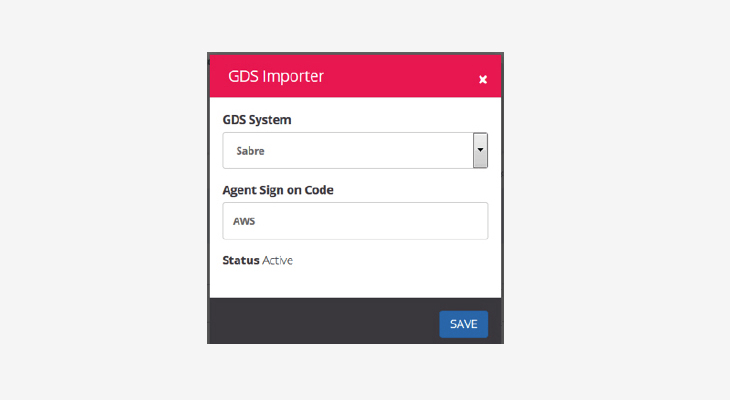
Once the PCC code for your Agency is saved, and the sign code is saved for the Agent, your GDS importer will become active. Intrwiz will start to import your bookings from the GDS. You can disable this by saving an empty value for the PCC and agent sign code.
When logged in as the Agency Admin, you can set up the PCC code for your Agency.

When logged in as an Agent, you can set up the Agent sign code for yourself.

Once the proper settings are created, Intrwiz will look into the GDS queue and import the booking that matches the Agency and Agents settings.
After creating the booking in the GDS, Intrwiz will drop this booking into Agent’s Intrwiz dashboard automatically. The Agency Admin can log in to Intriwiz to view all the bookings under the Agency as well as filter by agent.

Travelport Queue Setup
In order for Intrwiz technologies to retrieve agency PNRs created for the Intrwiz product, the process involves using the Apollo ‘QEP’ queue placement command to queue a PNR to a specified Snowstorm queue for processing.
Intrwiz will then check the queue at regular intervals, using the record locator to retrieve the rest of the traveller’s information, and generate the collaborative customer environment.
This document details the methods for enabling this functionality through either a hot key or a ‘silent listener’ installed on an agent’s Galileo Desktop installation.
Step 1. Test for Selective Access
Prior to installing, and with NO PNR active, enter QEP/2G60/33 in each PCC where you will be working.
If the response is:
NO AGREEMENT EXISTS FOR PSEUDO CITY –2G60
Enter the following entry one time only: PAPERA/2G60¤SNOWSTORM/23
If the response is:
NO PNR IN AAA
Then everything is set up as needed.
Step 2. Determine installation method
For automatic queuing of every PNR to Intrwiz for processing:
Quit Galileo Desktop
Run the installer that is included with these instructions (Windows only) Restart Galileo Desktop
Stop here in these directions, automatic queuing should now be enabled For manual queuing of select PNRs to Snowstorm for processing:
Continue through the rest of these instructions
Step 3: Programmable Keys Menu
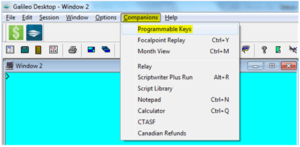
Select ‘Companions’ > ‘Programmable Keys’
Step 4. Select an Unused Key
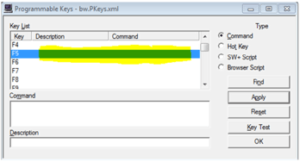
Step 5: Enter Queue Command
Command:
QEP/2G60/33
Description:
Queue PNR to Snowstorm
Note:
= (key to the left of #1 key)
= CTRL-ENTER
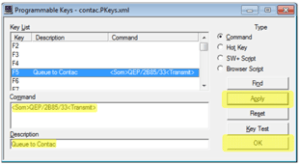
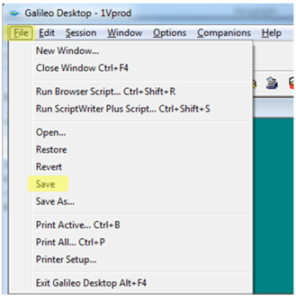
Step 6: Save
Sabre Queue Setup
In order for Intrwiz to retrieve agency PNRs created for the Intrwiz product, the process involves using the Sabre ‘QP’ queue placement command to queue a PNR to a specified Snowstorm queue for processing.
Intrwiz will then check the queue at regular intervals, using the record locator to retrieve the rest of the traveller’s information, and generate the collaborative customer environment.
This document details the methods for enabling this functionality through either via a terminal entry or Programmable (PF) keys.
Step 1. Test for Branch access
With an active PNR, Enter QP/SS PCC200/11 in each PCC where you will be working.
If the response is:

Create Branch Access
Enter the following entry one time only;
W/TAA[agency PCC]‡B{Your PCC]
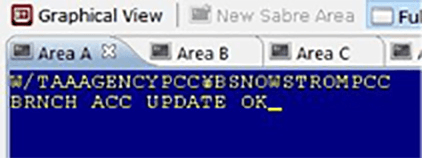
In case you are unable to do the above, you can reach out to your Sabre Helpdesk and they will be able to open the branch access.
Step 2. Determine Queuing method
For automatic queuing of every PNR to Snowstorm for processing:
You can create PF programmable keys with the QP entries as mentioned below in the Programmable Keys section.
For manual queuing of select PNRs to Snowstorm for processing:
Retrieve the PNR you want to Queue to SS PCC. Do QP/SS PCC200/11 entry in Sabre.
Step 3: Programmable Keys Menu
Open Quick & PF Keys under HELPER APPS

Select any unused PF Keys.
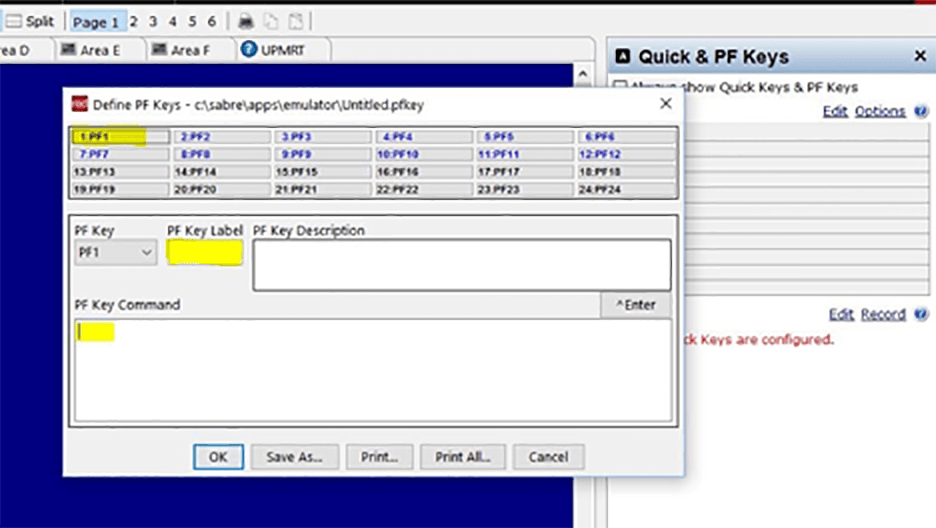
Enter Description like “Queue Snow” under PF Key Description.
Enter Command as mentioned below in the PF Key Command section.Command:
^SRFNBTS-SS PCC/187/11§6P§ER^ENote:
^ = key to the left of #1 key
§ = Backstroke key
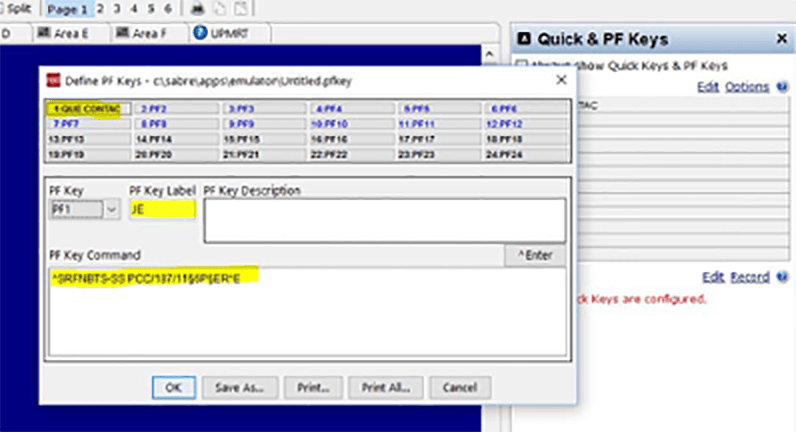
Click Save As under the emulator folder.

Amadeus Queue Setup
Coming soon!